LiDAR GTA V 1.2
941
31
941
31
LiDAR GTA V (https://github.com/UsmanJafri/LiDAR-GTA-V)
============================
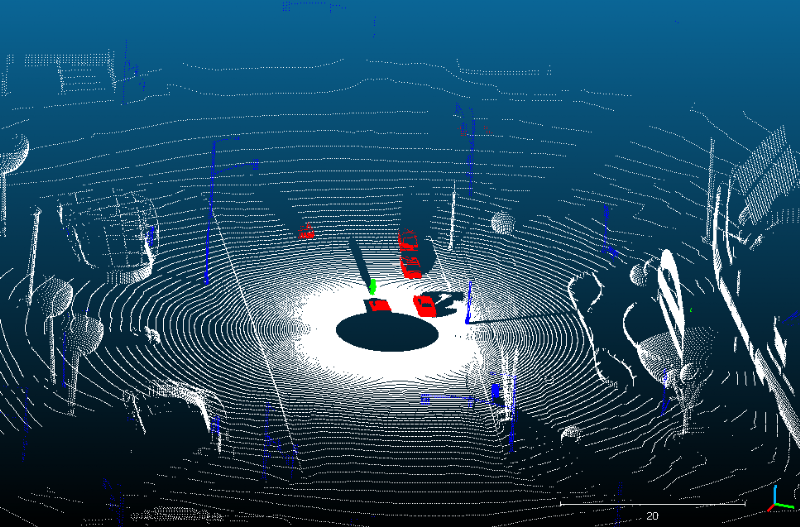
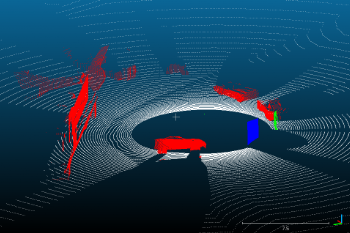
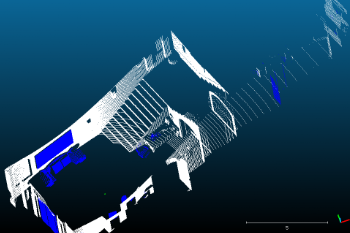
An open-source plugin for Grand Theft Auto V that generates a labeled LiDAR point cloud form the game environment.
Requirements
- Grand Theft Auto V
- ScriptHookV
Installation
1. Install ScriptHookV following its accompanying instructions
2. Copy-paste LiDAR GTA V.asi and the LiDAR GTA V folder into your GTA-V directory (the folder containing GTAV.exe*)
How to use
1. Navigate to #your_game_directory#/LiDAR GTA V/LIDAR GTA V.cfg and edit the parameters as needed. The parameters include: Horizontal FOV, Vertical FOV, Range, Density and Output filename
2. Start up GTA-V in a story mode
3. Press V to cycle through camera modes until first person mode is enabled
4. Press F6 to generate a LiDAR point cloud of the world
5. Output file is located under #game_directory#/LiDAR GTA V/#your_chosen_filename#.ply
6. The output is a Polygon File Format (.PLY) file containing only vertex data.
7. Vertex Color Code:
| Vertex Color | Label |
|------------------|---------------------------------------------------------|
| Red | Vehicle |
| Green | Humans and Animals |
| Blue | Game props |
| White | Road, Buildings and other hitable textures |
| Black | No hit |
8. It is recommended to use CloudCompare (an open-source point-cloud viewer) to view the PLY file generated by LiDAR GTA V.
Contributing
- Source Code: GitHub
- You will need Visual Studio 2019 or higher to open the project
- Any contributions to the project are welcomed, it's recommended to use GitHub Pull Requests
Acknowledgements
- Native Trainer (a ScriptHookV sample) was used as a starting point to import configuration.
Changelog
v1.2 - Optimization - camera coordinates and rotation parameters are now fetched once rather than on every ray cast
v1.1.0 - Added ability to customize LiDAR parameters
v1.0.9 - First public release
Первая загрузка: 3 августа 2018
Последнее обновление: 24 ноября 2020
Последнее скачивание: 9 ноября 2025
22 комментария
LiDAR GTA V (https://github.com/UsmanJafri/LiDAR-GTA-V)
============================
An open-source plugin for Grand Theft Auto V that generates a labeled LiDAR point cloud form the game environment.
Requirements
- Grand Theft Auto V
- ScriptHookV
Installation
1. Install ScriptHookV following its accompanying instructions
2. Copy-paste LiDAR GTA V.asi and the LiDAR GTA V folder into your GTA-V directory (the folder containing GTAV.exe*)
How to use
1. Navigate to #your_game_directory#/LiDAR GTA V/LIDAR GTA V.cfg and edit the parameters as needed. The parameters include: Horizontal FOV, Vertical FOV, Range, Density and Output filename
2. Start up GTA-V in a story mode
3. Press V to cycle through camera modes until first person mode is enabled
4. Press F6 to generate a LiDAR point cloud of the world
5. Output file is located under #game_directory#/LiDAR GTA V/#your_chosen_filename#.ply
6. The output is a Polygon File Format (.PLY) file containing only vertex data.
7. Vertex Color Code:
| Vertex Color | Label |
|------------------|---------------------------------------------------------|
| Red | Vehicle |
| Green | Humans and Animals |
| Blue | Game props |
| White | Road, Buildings and other hitable textures |
| Black | No hit |
8. It is recommended to use CloudCompare (an open-source point-cloud viewer) to view the PLY file generated by LiDAR GTA V.
Contributing
- Source Code: GitHub
- You will need Visual Studio 2019 or higher to open the project
- Any contributions to the project are welcomed, it's recommended to use GitHub Pull Requests
Acknowledgements
- Native Trainer (a ScriptHookV sample) was used as a starting point to import configuration.
Changelog
v1.2 - Optimization - camera coordinates and rotation parameters are now fetched once rather than on every ray cast
v1.1.0 - Added ability to customize LiDAR parameters
v1.0.9 - First public release
============================
An open-source plugin for Grand Theft Auto V that generates a labeled LiDAR point cloud form the game environment.
Requirements
- Grand Theft Auto V
- ScriptHookV
Installation
1. Install ScriptHookV following its accompanying instructions
2. Copy-paste LiDAR GTA V.asi and the LiDAR GTA V folder into your GTA-V directory (the folder containing GTAV.exe*)
How to use
1. Navigate to #your_game_directory#/LiDAR GTA V/LIDAR GTA V.cfg and edit the parameters as needed. The parameters include: Horizontal FOV, Vertical FOV, Range, Density and Output filename
2. Start up GTA-V in a story mode
3. Press V to cycle through camera modes until first person mode is enabled
4. Press F6 to generate a LiDAR point cloud of the world
5. Output file is located under #game_directory#/LiDAR GTA V/#your_chosen_filename#.ply
6. The output is a Polygon File Format (.PLY) file containing only vertex data.
7. Vertex Color Code:
| Vertex Color | Label |
|------------------|---------------------------------------------------------|
| Red | Vehicle |
| Green | Humans and Animals |
| Blue | Game props |
| White | Road, Buildings and other hitable textures |
| Black | No hit |
8. It is recommended to use CloudCompare (an open-source point-cloud viewer) to view the PLY file generated by LiDAR GTA V.
Contributing
- Source Code: GitHub
- You will need Visual Studio 2019 or higher to open the project
- Any contributions to the project are welcomed, it's recommended to use GitHub Pull Requests
Acknowledgements
- Native Trainer (a ScriptHookV sample) was used as a starting point to import configuration.
Changelog
v1.2 - Optimization - camera coordinates and rotation parameters are now fetched once rather than on every ray cast
v1.1.0 - Added ability to customize LiDAR parameters
v1.0.9 - First public release
Первая загрузка: 3 августа 2018
Последнее обновление: 24 ноября 2020
Последнее скачивание: 9 ноября 2025


 5mods on Discord
@Cyron43 Thanks for your comment. I am currently working on self driving cars and GTA's highly interactive environment is perfect for this. Real self driving cars use a range of sensors including LiDAR so I thought I could experiment with simulating a LiDAR sensor device in GTA.
Some use cases:
- LiDAR data could be use with some machine learning back-end perhaps for self driving purposes.
- Or perhaps existing LiDAR datasets can be augmented by including GTA LiDAR data like this.
@MrGTAmodsgerman Thanks for your comment. LiDAR is a sensor (like RADAR) used in self-driving cars and making 3D maps. This is a GTA simulation of the sensor.
@youjay So this script creates a 3D model of the current gta 5 scene?
@youjay Sounds interesting. Are you a pro working on such a project for real world self driving cars?
This is not useful for me in any way, but I love when GTA is being used for improvements in real-world stuff such as self-driving cars, so 5 stars just for that. Good luck with your work c:
This is insane, great job. Can't wait for the self driving cars script!
thanks so much for this.
What viewer did you use for the files? I'm having trouble opening them in all the default windows 10 3d object viewers
Wow! Impressive work!
Hey awesome project! Do you know of a good way to speed this up or pass the point cloud data into another script quickly? I am hoping to use this for a university class project on autonomous vehicle path planning. Thanks!
All the things are very good, but when i move the person using my keys, It does not follow the normal movements, It drifts only. And after sometime It either goes inside the land or float in the air. Can you fix these bugs? I am also working on self-driving cars, and have some personal doubts. Please provide your email id so that we can contact directly. Thanks for this work.
Please ping me, my mail ID is ravishrajx@gmail.com
It's a wonderful job!
Is it difficult to be able to move this in real time?
I challenged in real time but it was difficult with my power.
@ihexx CloudCompare is a popular point cloud viewer. Here's the link: https://www.danielgm.net/cc/
@murarin I tried a multi-threading based approach to generate the point-cloud in parallel on multiple cores. All of the approaches would crash the game.
@ravishk I designed this for static scenes initially. I had plans to further develop it to moving scenes but performance was a huge obstacle. I tried to multi-thread the point cloud generation but all my approaches would crash the game.
About going underneath the world: I am using the default gameplay camera as the source point. It would be a good idea to use a source point defined by yourself.
The source-code is available, feel free to modify it to your liking: https://github.com/UsmanJafri/LiDAR-GTA-V
@matdogg thanks for kind works! I did try multi-threading to speed it up but it always crashed the game. Good luck for your project!
Hi Youjay, great work on LiDAR implementation. Could you tell me how I can shift the LiDAR origin to top of the CAR such a way that top of the car will be the center/origin of x, y,z values for LiDAR raycast?
Are you a genius?
@youjay what does lidar stand for and what does this mod do
Can you make both outputs in pcd and ply file format?